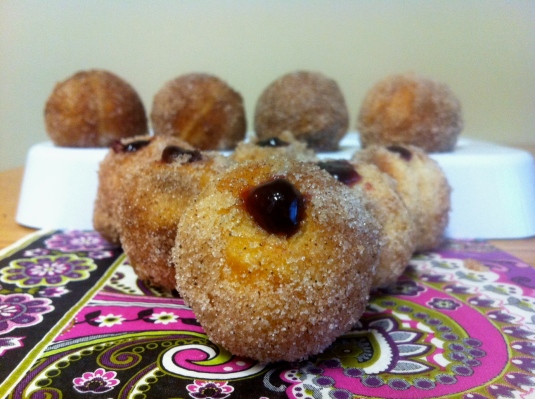
Jelly Stuffed Cinnamon Donut Holes

They HAVE to be healthy... they contain fruit!

I get into this recipe, I feel it is necessary for me to say a few words about Joe Paterno.  As many of you know, he passed away today after a short battle with lung cancer. Joe Paterno dedicated over fifty years of his life to Penn State, donating millions of dollars, and positively influencing thousands of young men and students. To look past all of the good he has done for my university, and to instead focus on his one mistake is wrong. He was quoted as saying, ‎”They ask me what I’d like written about me when I’m gone. I hope they write I made Penn State a better place, not just that I was a good football coach.” His family has requested donations to be made in his name to THON, the worlds largest student-run philanthropic organization that helps fight pediatric cancer.

Now on to happier subjects…

Last week, I received an EXTREMELY unexpected (but none the less AWESOME) gift from my friend Giulia: a Babycakes Cake Pop Maker! There are certain things that I, as a baker, are afraid to make. This list includes (but is not limited to): cinnamon rolls, fried donuts (or fried ANYTHING for that matter), and cake pops. I don’t know, the whole process of making a cake (only to ruin it), mixing with frosting, shaping into a ball, etc.etc. seems SO lengthy and time consuming. With this new gadget, I can make cake pops in FOUR minutes.

Unfortunately, I didn’t have all the ingredients I needed to make this awesome cake pop recipe today. However, this cake pop maker can make another one of my favorite treats…Donut Holes!!! I made a batch with grape jelly, and one without (since some hate fruit with their dessert!).

The results? They turned out great! A flavor-filled pop-in-your mouth dessert. They are sweet, moist, and the grape jelly really makes the donut hole THAT much better. The best part was how quick they were to make! It’s dangerous to have an awesome recipe that you can make and fill in less than 30 minutes!

If you don’t have a Babycakes Cake Pop Maker, don’t worry! You can still make this recipe in a mini muffin pan! 

This recipe is from the Babycakes Cake Pop Maker Instruction Manual.

Ingredients:

1/2  cup sugar

1/3 cup shortening

1 egg

1 1/2 cups all-purpose flour

1 1/2 tsp baking powder

1/2 teaspoon salt

1/4 teaspoon nutmeg

1/2 cup milk

6 tbsp butter, melted

Cinnamon-Sugar Topping:

3/4 cup sugar

1 1/2 tsp cinnamon

Directions for Cake Pop Maker:

  1. Beat together sugar and shortening in mixing bowl until light and fluffy. Beat in egg.
  2. Stir together flour, baking powder, salt and nutmeg.
  3. Alternately blend in flour mixture and milk into shortening mixture, beginning and ending with the flour mixture.
  4. Fill each cooking reservoir with about 1 tbsp batter ****
  5. Bake 4 to 5 minutes or until a toothpick inserted into puffs come out clean.
  6. For cinnamon-sugar topping, combine cinnamon and sugar in small bowl. Immediately roll hot puffs in melted butter then in cinnamon-sugar mixture.
  7. Once cooled, stuff donuts with your choice of jelly, jam, or even chocolate! Mine came with a little tool for stuffing, but you can stab the side of your donut holes with a pastry bag tip and fill it through the pastry bag!
**** I found it easiest to put the batter in a ziplock bag, and snip the bottom corner to pour the batter into the machine.

Directions for Mini Muffins:

  1. Preheat the oven to 400 degrees and generously spray a mini muffin tin.
  2. Beat together sugar and shortening in mixing bowl until light and fluffy. Beat in egg.
  3. Stir together flour, baking powder, salt and nutmeg.
  4. Alternately blend in flour mixture and milk into shortening mixture, beginning and ending with the flour mixture.
  5. Fill each muffin cup half full. Bake for 9-12 minutes, or until tops are golden brown.
  6. For cinnamon-sugar topping, combine cinnamon and sugar in small bowl. Immediately roll hot mini muffins in melted butter then in cinnamon-sugar mixture.
  7. Once cooled, stuff donuts with your choice of jelly, jam, or even chocolate! Mine came with a little tool for stuffing, but you can stab the side of your donut holes with a pastry bag tip and fill it through the pastry bag!


1,000 views! And Oreo Stuffed Brownies

I started this blog two months ago, not expecting much at all. It was meant to simply be a hobby and a way for me to share recipes with friends for treats that they have enjoyed in the past. Though it may not seem like much to some, I am SO EXCITED that in 60 days I have accrued over 1,000 views. I am so glad that I have the ability to not only spread my love for baking to friends, but also to strangers around the world! I promise you that this year will bring bigger, and better (if at all possible :P) recipes!

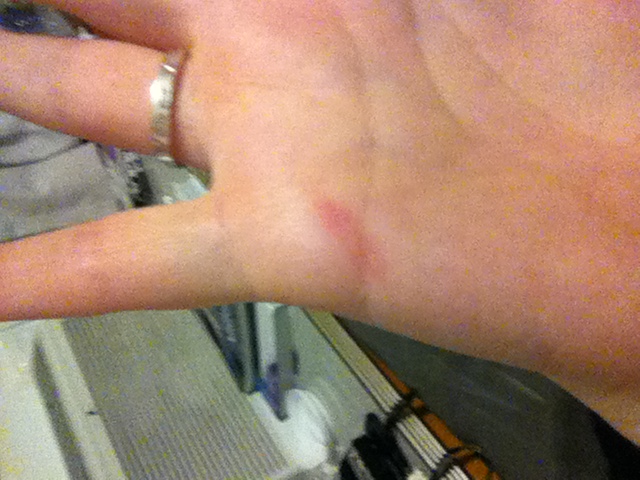
As my fellow bakers know, baking can be dangerous! Me, being as clumsy as I am, is at even higher risk of injury. Yesterday, while making the delicious treats pictured above, I endured quite a large baking war wound: a burn  to the hand. I was horrified that it would turn into a nasty blister, but luckily none have appeared.

I survived the great burn of 2012.

In the end, these oreo stuffed brownies turned out delicious and the prognosis for my hand is good!

If you haven’t checked out my previous posts, I love to incorporate different flavors and combinations of a variety of baked goods into one epic dessert. One of my favorite things to do is to add oreos to any ol’ recipe; oreos make EVERYTHING taste better! Luckily, Picky Palate (one of my FAVORITE blogs!) shares my love for adding oreos to everything. She adds icing and sprinkles to her creation, but I am not a humongous fan of icing on brownies.

The end result for this recipe is a delicious, moist, chocolate-y and creamy (from the center of the oreo) brownie. This is a great recipe for my fellow college students; it is quick, extremely simple, and the portion sizes are perfect (one muffin cup!).

Ingredients:

1 brownie mix (I buy the 9×13 variety, although I don’t believe that matters!)

1 box of oreos ( I use the double-stuffed variety…more yummy cream!)

  1. Preheat oven to 350 degrees. Prepare brownie mix, following the instructions on the box; leave in mixing bowl. Generously spray two muffin tins. Dip oreos in brownie batter and place in bottom of muffin tin.
  2. Bake for 10-12 minutes, or until brownies are cooked through. THIS IS THE IMPORTANT PART: immediately upon removal from the oven, use a knife and run along the edges of each brownie; this will make it possible to later remove the brownies from the tin.

Cinnamon Swirl Loaf Cake

Cinnamon-y goodness

I am THIS close to being finished with the first week of classes  for the semester and I CAN’T WAIT for this upcoming three day weekend. I am not a morning person by any stretch of the imagination; I am the type who NEEDS her beauty sleep or I become what I like to call a “cranky pants”. Most people describe me as cheerful or outgoing, however if you stumble into me at 8:00 in the morning I am more like a grumpy, hungry zombie.

With the extra day of relaxation, I will definitely be catching up on some sleep AND some recipes that I have been dying to make! One recipe that I have always wanted to try have been Cinnamon Buns. For a college student who lacks a ton of free time, though, most Cinnamon Buns recipes seem complex and time consuming. However, I have found the PERFECT solution: Cinnamon Swirl Loaf Cake!

This recipe is super simple to make, using ingredients that bakers have right in their kitchen! It is also extremely quick to put together: in less than 15 minutes I had this bad boy in the oven. The delicious cinnamon scent filled my entire apartment (and made me salivate :P). I didn’t think it was possible, but the only thing better than the aroma given off by the loaf cake was the TASTE. It tasted exactly like a cinnamon bun! The cake was moist and filled with flavor. My official lab taste testers, Cori and Giulia, gave this recipe two thumbs up calling it “amazing”. Even Nicholas ate it up and praised the recipe!

This recipe is from Tried and Tasty.

Ingredients

1/3 c sugar
2 tsp ground cinnamon
1 c sugar
2 c all-purpose flour
1 tsp baking powder
1/2 tsp salt
1 egg (I didn’t have an egg, so I used applesauce and it infused a great flavor!)
1 c milk

1/3 c vegetable oil

  1. Preheat oven to 350 degrees. Grease/flour/spray the bottom and sides of a 9″x5″x3″ loaf pan.
  2. Combine 1/3 cup of sugar, and cinnamon. Set aside. Combine 1 cup of sugar, flour, baking powder, and salt in a bowl or mixer bowl. In a separate bowl, beat egg. Then, stir in milk and oil .
  3. Make a well in the flour mixture, and add the egg mixture. Stir just until mixed. Do not over mix. Pour half of the batter into loaf pan. Sprinkle with half of the cinnamon mixture. Repeat.
  4. With a wide rubber scraper or spatula, swirl mixtures together with a down and up circular motion. Bake for 40 to 50 minutes or until done. Cool in pan for about 10 minutes. Then, cool completely on a wire rack.

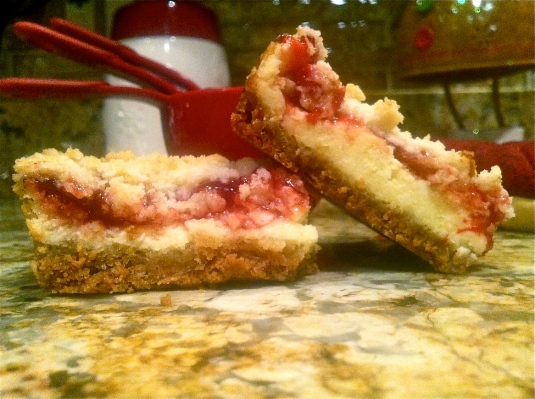
Cherry Cheesecake Bars

There are cherries on here...does that mean it's healthy?

I’m baacckkkk…. at school that is. Which means two things: my stress levels are going to go through the roof, and the quality of my blog pictures are going to go WAYYYYY down.

When I went home my father made a baking request; these are rare and always granted. He told me that both himself and my mother LOVE Cherry Cheesecake.  Now, I don’t know if you have noticed, but I don’t like to make “traditional” desserts: I combine things, and I love to change their form. So when I saw this Betty Crocker recipe,  I KNEW that I had to try it.

I was never a humongous fan of cheesecake; I enjoyed cream cheese exclusively on my bagels (and in certain crock pot recipes). After trying out this recipe, however, I have to admit that my position has changed. This recipe was SPECTACULAR. It was simple (with my KitchenAid Mixer), decadent, and delicious. The rich, creamy cheesecake layer was paired perfectly with the sweet cherries. What makes this even better? The crust! Instead of a traditional graham cracker crust, this recipe calls for sugar cookie mix instead! A sweet treat and a great alternative! I omitted the almonds that the recipe calls for since my mother doesn’t like them, but I am sure that they would have made this dessert even better.

Ingredients:

Cookie Base and Topping:

1 Pouch Sugar Cookie Mix (1 lb 1.5 oz)

1/4 cup cold butter or margerine

4 oz (half of 8 oz package) cream cheese

OPTIONAL: 1/2 cup sliced almonds

Filling:

2 1/2  packages (8 oz each) cream cheese, softened

1/2 cup sugar

2 tbsp all-purpose flour

1 tsp almond extract (I did not have this on hand, so I substituted vanilla extract)

2 eggs

1 can  (21 oz) cherry pie filling

1.Heat oven to 350°F. Spray bottom and sides of 13×9-inch pan with cooking spray. Place cookie mix in large bowl, or bowl of a standing mixer. Cut in butter and 4 oz cream cheese, using pastry blender or fork, until mixture is crumbly (I personally just mixed this in with the mixer). Reserve 1 1/2 cups mixture for topping. Press remaining mixture in bottom of pan. Bake 12 minutes.

2.Meanwhile, in large bowl, beat 20 oz cream cheese, the sugar, flour, almond extract (or vanilla) and eggs with electric mixer on medium speed until smooth.

3.Spread cream cheese mixture evenly over partially baked cookie base. Spoon pie filling evenly over cream cheese mixture. Sprinkle with reserved topping and almonds.

4.Bake 40 to 45 minutes or until light golden brown. Cool 30 minutes. Refrigerate about 2 hours or until chilled. For bars, cut into 6 rows by 4 rows. Store covered in refrigerator.

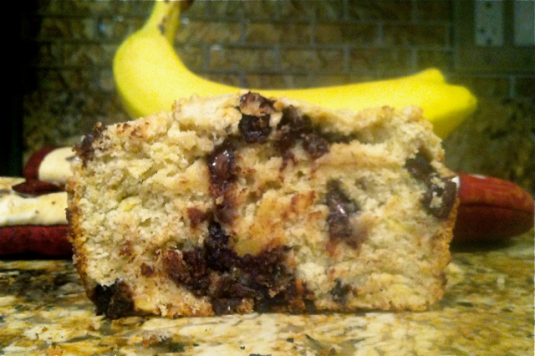
Banana Dark Chocolate Chip Bread/Cake

It's almost healthy!

First and foremost- HAPPY NEW YEAR! Today is an exciting day; as I type this post, Nicholas is on his way back from the airport! Tomorrow I finally get to see him again, which means a lot more cuddles and a lot less baking.

Chocolate is my favorite, but sometimes I just feel SO guilty indulging. When these feelings arise, I start eating dark chocolate (it has a bunch of health benefits, ya know…). And when I REALLY feel guilty, I try to bake with fruit.

I dont know what to call this recipe…is it a bread? is it a cake? Lets not focus on semantics, lets just call this DELICIOUS. The texture is spectacular, the taste phenomenal. The mixture of banana and dark chocolate is like a love affair in your mouth. Oh, and did I mention it is super simple to make? It’s a unique treat to make and will only break your New Year’s Resolution a little :P.

This recipe is from Things For Boys. It makes one standard loaf, or two smaller aluminum foil loafs.

Ingredients:

2 cups AP Flour

2 tsp baking powder

3/4 cup sugar

7 tbsp unsalted butter (melted)

2 eggs, lightly beaten

1 tsp vanilla extract

3 ripe bananas

1 heaping cup dark chocolate chips

An additional 1/8 cup sugar for sprinkling

  1. Preheat oven to 350 degrees, lightly grease your loaf pan.
  2. Mash the bananas, I used a regular ol’ potato masher.
  3. Sift the flour and baking powder in a large bowl. Mix in 3/4 cup sugar. Make a well in the center and add the eggs, melted butter, mashed bananas, and vanilla extract and stir to combine. Stir in the chocolate chips.
  4. Pour the batter into the loaf pan. Sprinkle the top with 1/8 cup sugar and bake for 50 minutes- 1 hour. Leave to cool in the tin for 5 minutes before turning out onto a wire rack to cool.